Since fall is halfway over I decided it was time to get my board done that I have had in my craft ideas book forever!! Ok, I would have had it done awhile ago, but my awesome handy man hubby has been crazy with school this semester and has had no time to cut out my leaves for me. I can to straight cuts, but do not dare to even attempt what he did for me!
{HERE IS THE TUTORIAL ON HOW TO MAKE IT}
What You Will Need To Make It:
-Wood Board 31 1/2"x5 1/2" (I know the size is completely weird. I just used a scrap board my hubby had laying in his pile of wood. You can make it bigger or smaller then that)
-2 Big leaves
-2 Little leaves
-Light brown paint
-Sand Paper
-Any color stain you wish (I used Early American)
-Fall Colored Paper
-Mod Podge
-Hot glue gun
-Brown Vinyl Lettering
How To Make This Board Sign:
Once you have your board, make sure the edges are sanded how you want them to be. Then you are going to paint it. I did two coats on mine.
After it is completely dry you are just going to touch up the edges with sandpaper. I am not too neat when I paint. I like to have some of the wood showing around the paint, but usually get paint where I don't want it, but that's why we have sand paper, right?!? He can fix all of mistakes on wood!
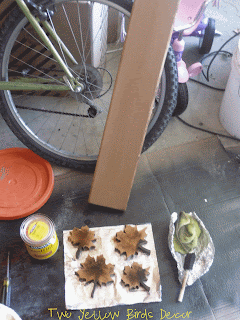
When you get that how you want it you are going to stain the whole board, back and front. You will also stain your wood leaves too. Let them dry completely. It will take a couple of hours.
After they are dry you will work on the leaves. I found some cute fall leaves paper at the craft store. I bought some other paper that matched it. When I cut it all out and put it on the leaves I did not like it. BUMMER deal:( But my awesome Mom came to the rescue with some orange paper. It had a pattern almost like a leaf does. It was perfect!
Once you have your paper selected you are going to trace the leaf and then cut it out. I traced it on the back of the paper. If you choose to do this also make sure you flip the leaf otherwise the back of the paper will be the front of your leaf! When you cut it out you will cut a little below your line. This way you can have some wood showing around the paper.
After you get them all cut out you are going to mod podge the paper onto the leaf.
While the mod podge is drying you are going to work on your saying. I chose the saying "Fall...Fell" I thought it worked perfect with the leaves. I used the font Elise found here. I cut that out with my cricut using brown vinyl. I then centered and stuck it on the board.
Lastly, I hot glued the leaves into place. Here is the finished picture again...
I am so excited about how it turned out!! What do you think?
Joining the following link parties:


Such a cute fall decoration. Love it!
ReplyDeleteWe should totally sponsor eachothers blogs! What do you think?
ReplyDeleteI love the sign and I'm a new follower! Thanks for following my blog, too!
ReplyDeleteLove how it turned out! Wish I had the tools to cut my own wood like that! So glad you linked up with us at Show & Share!
ReplyDeleteMarie
mylilpinkpocket.blogspot.com
I love it Jill! I wanted to drop by to let you know that I featured you this week on my show and share post. Come check it out and grab a feature button. Thank you so much for linking it up. http://tyandwhitneyulrich.blogspot.com/2011/11/show-and-share-13-and-features.html
ReplyDelete