Recently On Two Yellow Birds Decor

Showing posts with label Kid's Room Decor. Show all posts

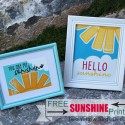
Inspirational Sign

A little while ago I heard a saying that has stuck with me ever since. It is something I need to remember and something I want to teach my kids. I decided to make something for my daughter to put in her room so she can see this every day for the rest of her life. She can't read now, but I explained to her what it said and what it meant when I gave her this. Then when she can read she already knows!


Since I have kept you waiting long enough, here is what the saying is:

I want to teach her that, especially when she gets older, she doesn't need to try to be anyone else but herself, because SHE is the most beautiful person! 


Today I am going to show you how I made this cute sign for her!!


How I Made It:

I had a frame on hand that I got at a local thrift store awhile back that I wanted to use for this. 


First, I spray painted the frame pink. I took the back out of the frame and got to work. I put 3 coats of paint on. 


In between working on the spray painting, I got on my computer to do the rest of this project.

I saw a cute project that Lindsey at Southern Lovely had done with some super cute paper. After reading through her post I found out she printed this paper for free off the interenet. I had to go check out this site. Let me tell you...it is AMAZING!! There are all sorts of different papers, patterns, and colors for you to choose from and all for FREE! You will have to go check it out. Link is below.

-I printed off the spritzed stencil chevron paper HERE at Mels Stampz
-The purple polka dot paper is scrapbook paper I had on hand
-I designed the beyoutiful tag in my photoshop on my computer. If you don't have that, I think picmonkey would work too.


I used a glue stick to glue all of those together.


When that was done, I put it in the frame and closed it up!
Super easy!

I love how the whole thing came together and I'm so excited to get it put up in her room!


Joining the Following Link Parties HERE

Princess Bed Makeover

About 6 months ago we bought my little Kaitlyn a Princess Bed. We found it for an awesome deal at the RC Willey Clearance store and had gift cards that we needed to use so we got it. The bed has fabric that goes over different areas to make it look like a castle. It had one that went around the bottom part for a little hut under the bed. There was only one problem with this one piece. Every time the kids went under there they would pull it down. Some times I would crawl under there and pull it down with my knees as I went under. It was a pain, but I kept putting it back up. 

A few weeks ago my husband came to me and had a great idea. He thought of this all on his own. He wanted to make something out of wood to put around the bottom. I was a little skeptical of the idea. I didn't know how well it was going to work with the kids, but he told me to trust him so I did. 

Here is what it looked like before:

**I am going to apologize now about the pictures. Her room is small and she shares with her little brother so there is a crib in there too for him so its hard to get the best pictures of it!**

This really is not the best picture of it, but at least you can see the bottom part of the piece that kept falling off!

I am SO GLAD I trusted my husband. It turned out so CUTE! 

Here is what it looked like when he put it up:

He put a door in and a little window. He also did a side piece  with a door and window as well. I couldn't get a very good picture of that. 
Kaitlyn LOVES it! Oh and so does her little brother too!! They love to sit on opposite sides and open the window to see each other!

We wanted to add a little bit of Kaitlyn to it so we made a cute little thing to go above the door. We got on the computer and cut out "Princess Kaitlyn" in white vinyl. 

The other day we were at Michael's and Kaitlyn found some cute butterflies made of jewels. She begged me to get them. I said, "No" but then I got to thinking that these would actually go really cute on her bed. So we got two of them. 

We put one on each side of the the 
"Princess Kaitlyn."

I Love how it all turned out. Of course, little miss LOVES it too:)

Lastly, here is somewhat of a full picture of the bed!!
And Yes...little miss gets to slide down her bed every morning!!!!

Joining the following:


{Junk in their Trunk}


52 MantelsThe Taylor House


 One Artsy Mama
the Grant Life


Country Momma Cooks

Baby Initials {Nursery Decor}

My amazing oldest sister just turned 40 in December. She has been married for 12 years. They have been trying to get pregnant ever since. They have had no such luck. Long story short....after many many years they finally were able to get pregnant all on their own!!!!! It is such an exciting thing happening in our family. She is actually having her little boy in 2 weeks! I can't wait to meet him. A couple of weeks ago all my sisters, mom and I threw her a baby shower. I wanted to make something for her to put up at the shower for decoration and also that she could take home with her to put in his nursery. 

I finally came up with the idea of getting his initials in paper machete letters and then making a sign to put next to them. I went to Hobby Lobby to get the letters. 

She is doing his room in Jungle Theme so I found some paper that went with that. I then traced the letters on each paper and cut that out.

Next, I mod podged the paper to the letters.

While that was drying I made a sign that I put next to the letters. I saw this saying last fall and knew it was PERFECT for my sister with this baby coming. The saying is "Such a tiny baby for such a big miracle." I found a block of wood and painted it lime green. 

After that dried I stained the whole thing. I used the color red mahogany. I love this color. There really isn't a lot of red in it. It just goes really dark brown.


Next, I cut out the saying on my cricut using brown vinyl and put that on the block. I put a coat of mod podge over  it so the letters don't come off...especially since its going in a baby's room!
I found some cute brown polka dotted bottle caps at Hobby Lobby. I fell in love with them. I stuck one to each letter. On one of the letters I added lime green leaves behind it.

Here is what is looks like all done:


Joining the Following:


div align="center">{Junk in their Trunk}http://www.thegrantlife.com/search/label/financial%20friday
One Artsy Mama
Blogging tips