
I saw the cutest idea to make a cupcake liner topiary from A Mommy's Life With a Touch of Yellow. She did one back in March for St. Patrick's Day and I thought it was so cute. So I decided to make one. It will eventually go in my kitchen but since we are living with my parents it is just going into the bedroom for now.
Here are the supplies you will need:

-Cupcake liners (I found mine at Michael's. I decided that I wanted two different types, but one type would be just fine.) I got 4 packages because I wanted to put them in tight.
-Styrofoam ball
-Hot glue gun and hot glue sticks
-2 wood dowels (I painted one and the other to help glue the cupcake liners in with. That way you don't get burned and it help gives it shape)
-Pot or some type of a container to put it in
-Styrofoam to put into the pot
-Ribbon
-Crafting grass
-Paint
This is What I Did:

-First I spray painted my clay pot black so it would go with my black, white, and red color scheme. While that dried I worked on the next steps

-I painted the dowel red
-After it dried I glued it into the styrofoam ball so it would stay in place
-Then I started putting in the cupcake liners
-I wrapped the cupcake liner around the dowel giving a flat surface. I put some hot glue on the flat surface and pushed it into the styrofoam ball (Sorry its hard to see this step!)

-Hold it there for a few seconds giving it time to dry. There was a couple of times I didn't and it didn't stick very well!
-I just continued doing this all the way around the ball. Since I chose to use two different colors and patterns, I did two rows of the black and white and one row of red. It worked perfect to do that all the way to the top.
-After it was completely done I put some styrofoam in the pot and put the topiary in.
-To finished it I put fake crafting grass in to cover the styrofoam and put some ribbon around the pot.
It is super cute and very easy! It just takes a little patience glueing the liners in!!
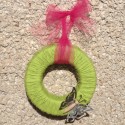
THE FINISHED PRODUCT:

It turned out exactly how I wanted it to! I am so happy with it!!
Joining the Following:
Funky Junk Interiors for SNS
Joining the Following:
Funky Junk Interiors for SNS
I love it girl! The colors are so fun. I am co-hosting a link party right on my blog come and link this and all your other projects up on it. Jut go to this link and click on the link up button on the bottom of the post. Lets get your cute name out there girl!
ReplyDeletehttp://tyandwhitneyulrich.blogspot.com/2011/08/show-and-share-linky-party-1-co-host.html
Thank you so much Whitney!! You are so sweet! I am totally linking up!
ReplyDeleteI am so glad you linked up to Show & Share, this is adorable! So creative & unique!
ReplyDeleteBy the way, I have a giveaway going on now, if you'd like to check it out!
http://southernlovely.blogspot.com/2011/08/uprinting-giveaway.html