
Earlier this year when I went to Swiss Days, which you can read about HERE,
we ran into my Aunts and cousins. One of my Aunts bought some
cute Elf wood block letters. I honestly don't even remember what they look
like but the whole idea of the Elf Letters have stuck in my head.
I knew with my hubby's handy skills I could make some myself.
So I did just that!!
Today I have a tutorial for you on how I made mine.
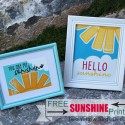
Here is what they look like:

How to make them:
First off, my super amazing hubby cut out the wood letters for me.

Don't mind the coloring on the blocks.
My 2 year old found a marker and decided it would be super fun to color all over them!! Oh well, I didn't worry too much because I am covering them up!!
First, I painted the letters red with craft paint.

You can still see the fabulous artwork from my baby, but that's ok because here is the cute scrapbook paper I used to cover that up!!

I traced each letter onto a piece of the scrapbook paper. I cut that out to fit the size of the letter exactly. Then I used mod podge to get the paper onto the wood.

When those dried, I sprayed glitter spray over them to give them a little Elf Sparkle!! I did 2 coats of that on them.

When that fully dried, I put ribbons around each letter and then cut some white felt for the "L" to help make it look like an actual Elf Shoe.

Now for the Elf Kisses.
I bought a vase at the dollar store awhile back just waiting for the right project. This was it!! I also bought 2 bags of Hershey Kisses.

I got on my photoshop and created a cute label that says "Elf Kisses". I have made that available to you to download for FREE! Go HERE to do that!

I cut it down how I wanted it and laminated it so it would be protected on the jar.

I got out some red glitter ribbon to put around the jar.

I cut that down to size and then hot glued everything to the vase.

It's simple, but cute. I didn't wanted the main attention to be on the letters since this is going next to them!
Here is what they look like together:


I love love how it all turned out!!

Joining these Link Parties HERE
Jill, I love the elf kisses! What a great idea!
ReplyDeleteGreat job with the letters- always fun to create different words :) and it doesn't get much better than ELF! happy holidays!
ReplyDeleteWow! These are so cute! You're lucky your husband is so handy - he did a great job! My daughter started the Elf on the Shelf tradition this year for my 3 yr old grandson. So I will definitely have to make her a set of these letters for next year. Thanks for sharing! :D
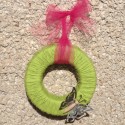
ReplyDeleteOh and if you have a minute, check out the recycled water/soda bottle wreath I made for Christmas. I was going for a Peppermint/Christmas candy theme but I think I ended up with a Peppermint Explosion! But that's OK cuz I really like how it turned out. :D You can see pictures of it here: https://www.facebook.com/media/set/?set=a.4561188901215.2166783.1036342162&type=1&l=af9ae75b7e
This comment has been removed by the author.
ReplyDelete