


First off I can't believe we are just ONE WEEK away from Halloween!! Crazy that this month flew by! I have been feeling a little behind with getting my crafts done that I wanted for Halloween but I finished my last one on Thursday which were the Glass Bottle Mummies. So I am feeling pretty good that I got them done at least a week before Halloween so I can enjoy them!!
**Now Onto Today's Post**
This is the second project that I came up with when my Mom, sisters and I got together last Monday. The other one we did was the Witches Boots. I was planning on doing this for myself and decided to see if any of my sisters wanted to do them as well. Some of them did! So that's why we ended up doing two projects this get together. They turned out so cute and were so easy to make!!

What You Will Need:

-3 different sizes wood "candy corn" shaped blocks
-White, Orange and Yellow paint
-Blue paint tape
-Paint Brush
-Sand paper
-Stain (Whatever color you like will work..I used Early American)
How To Make Them:
First, you are going to figure out how big you want each section to be on the candy corn and then you are going to tape it off with blue tape. Put the tape in the middle section. This is the best way to start. This was the hardest part for me. For the small candy corn I cut the blue tape down a little bit. The middle candy corn I used the width of the tape. For the biggest candy corn I used one strip of the tape and then put another on to add just a little more thickness on. I didn't take it up very much.
**If you are more brave then I am you can totally do this freehand if you want!! I am just not very good at getting my lines straight so I need a guideline!!

After you get it taped you are going to paint the top white and the bottom yellow. I did 3 coats on mine. I didn't want to see the grain of the wood. I painted the front, back and sides- so the whole thing!

When that all dried I took the blue tape off and painted the middle orange. I didn't want to mess with the tape too much so I just put it on the front and back over the white and yellow and did the sides free hand.

I do not have pictures of the next 2 steps. I am so sorry!! After they were all good and dry I sanded the edges down on both sides of each candy corn. Then I stained where I had sanded and put a little stain over the paint to give it an antiqued look!
Here Are The Candy Corns All Done:

Such Awesome Cuteness!!!
Here is a good picture of the size difference
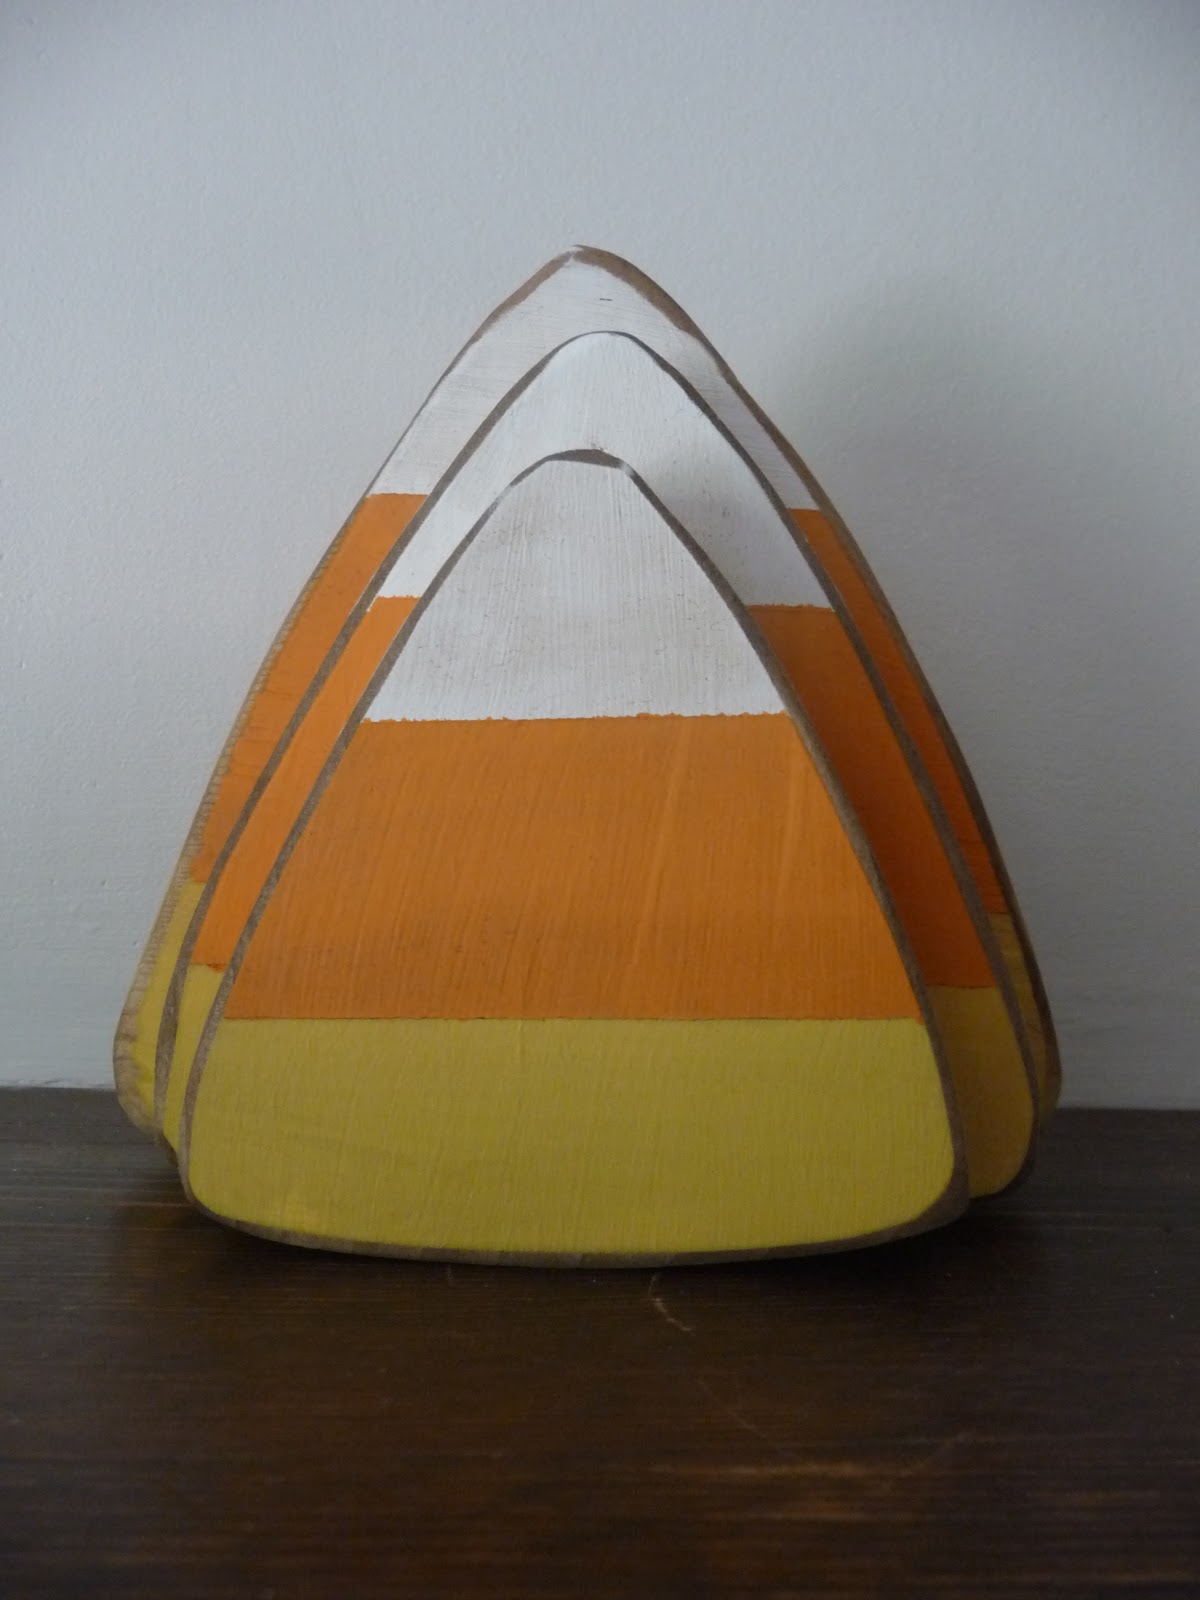
The sizes on mine are based on: Height- Top point to the middle of the bottom. Width- The two points across the bottom. Biggest One: 5 1/2"x5 1/2" Middle One: 4 1/2"x4 1/2" Shortest One: 3 3/4"x3 1/2"

Joining the Following:


These are so cute!! Hope it's ok that I showed them on my blog. :)
ReplyDeleteI love the candy corn where do you get all this wood stuff from again? I love it all. Thanks for linking up and sharinf;)
ReplyDelete